- 1. Emergency Response Admin Console
- 2. SSO Admin Console
- 3. Kafdrop Web Console
- 4. Red Hat Data Grid
This guide details the privileged functions available to the Emergency Response Demo administrator or presenter.
1. Emergency Response Admin Console
As part of the Emergency Response Demo installation process, a privileged user is created using the following credentials:
username: incident_commander
password: Defined Here
This user has the ability to manage priority zones as well as the location of the disaster. Further details about these functions can be found below.
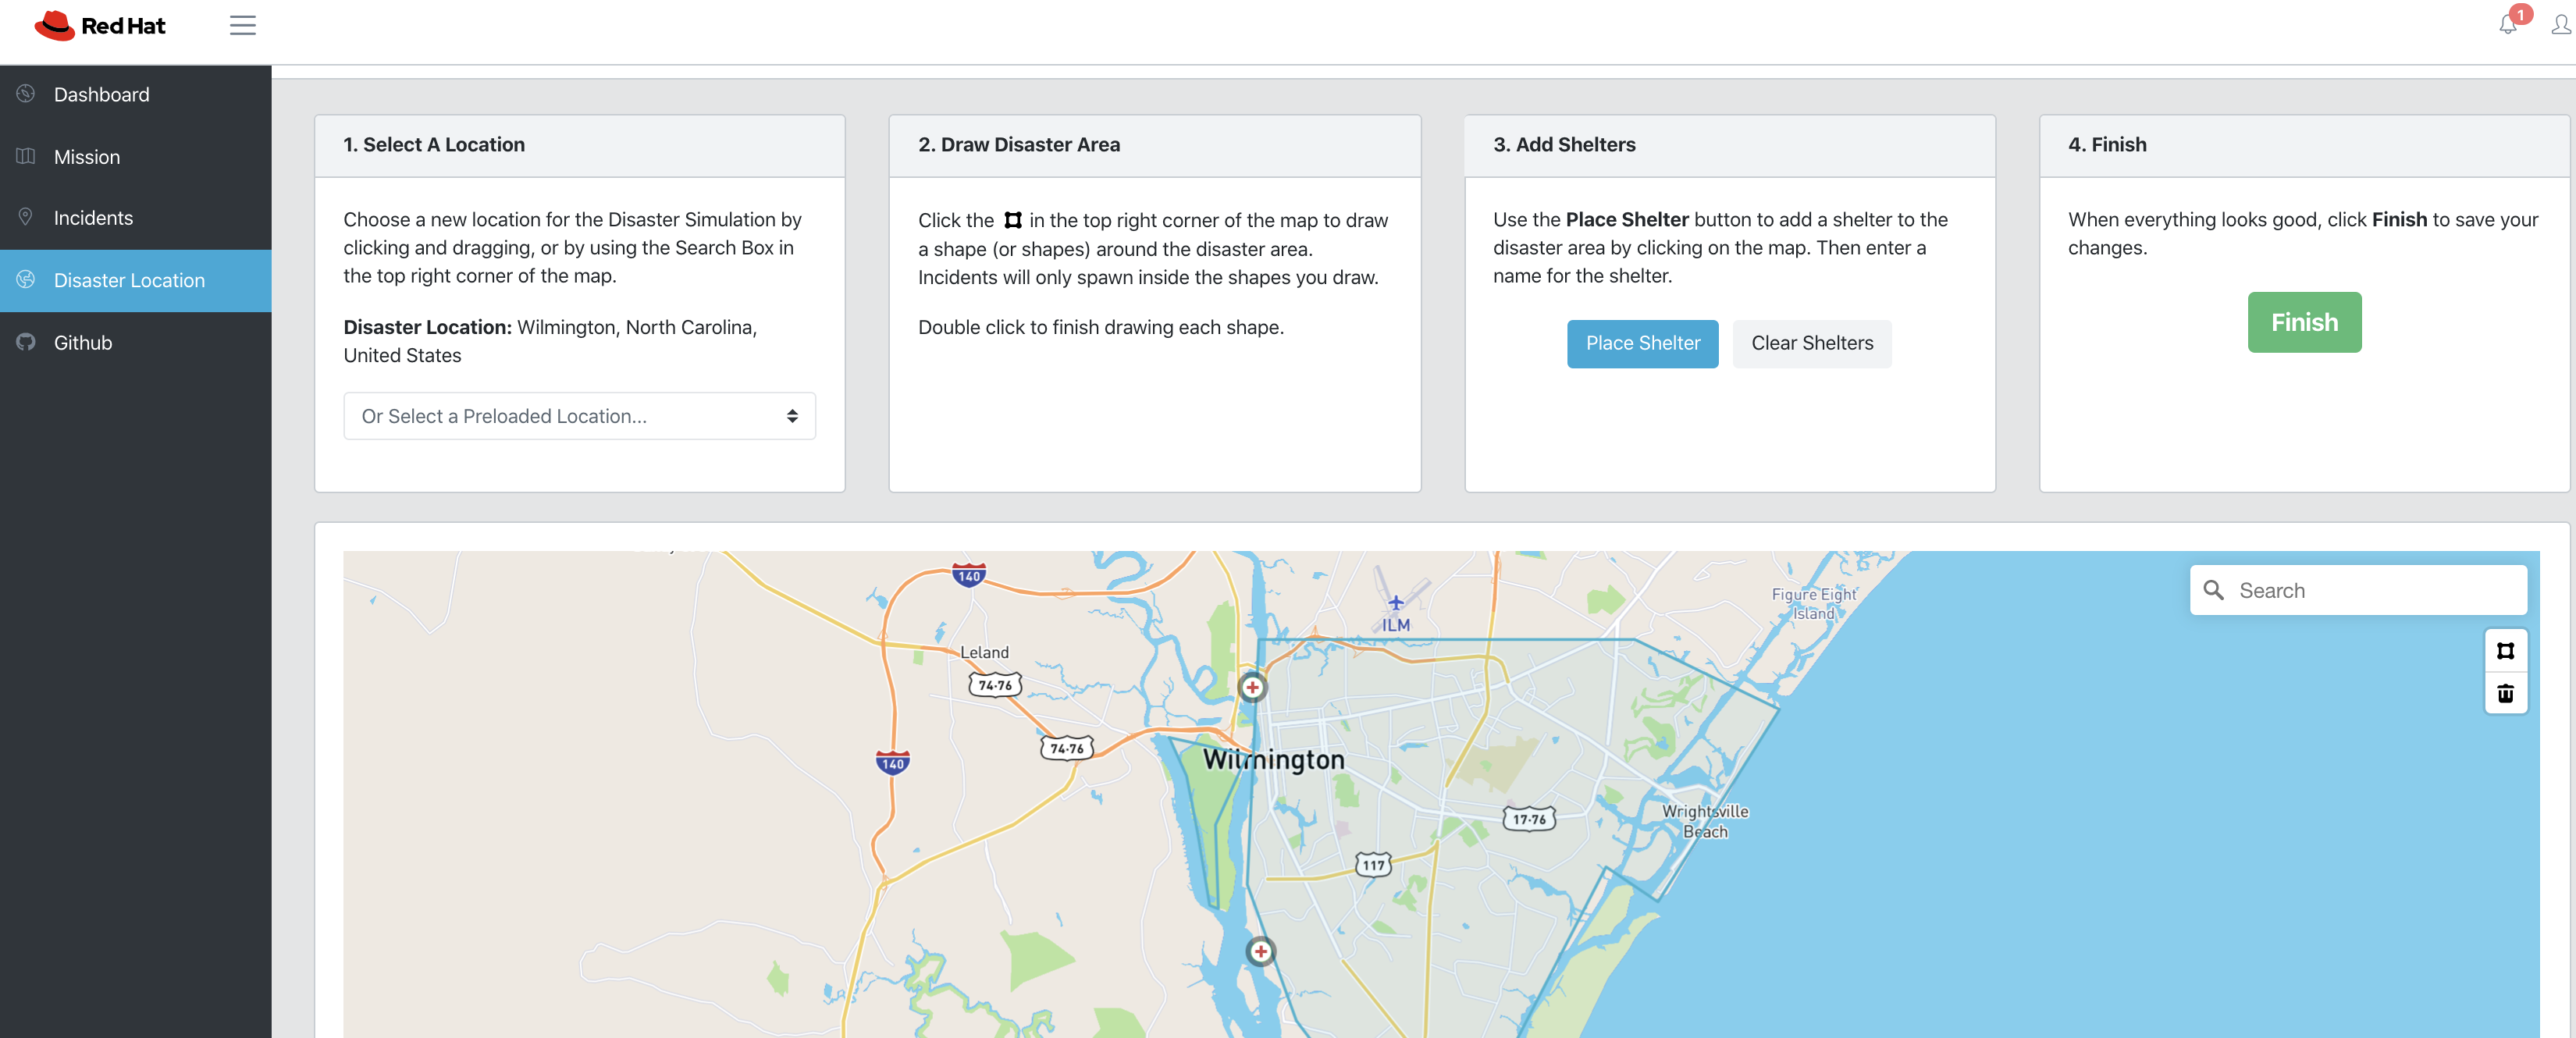
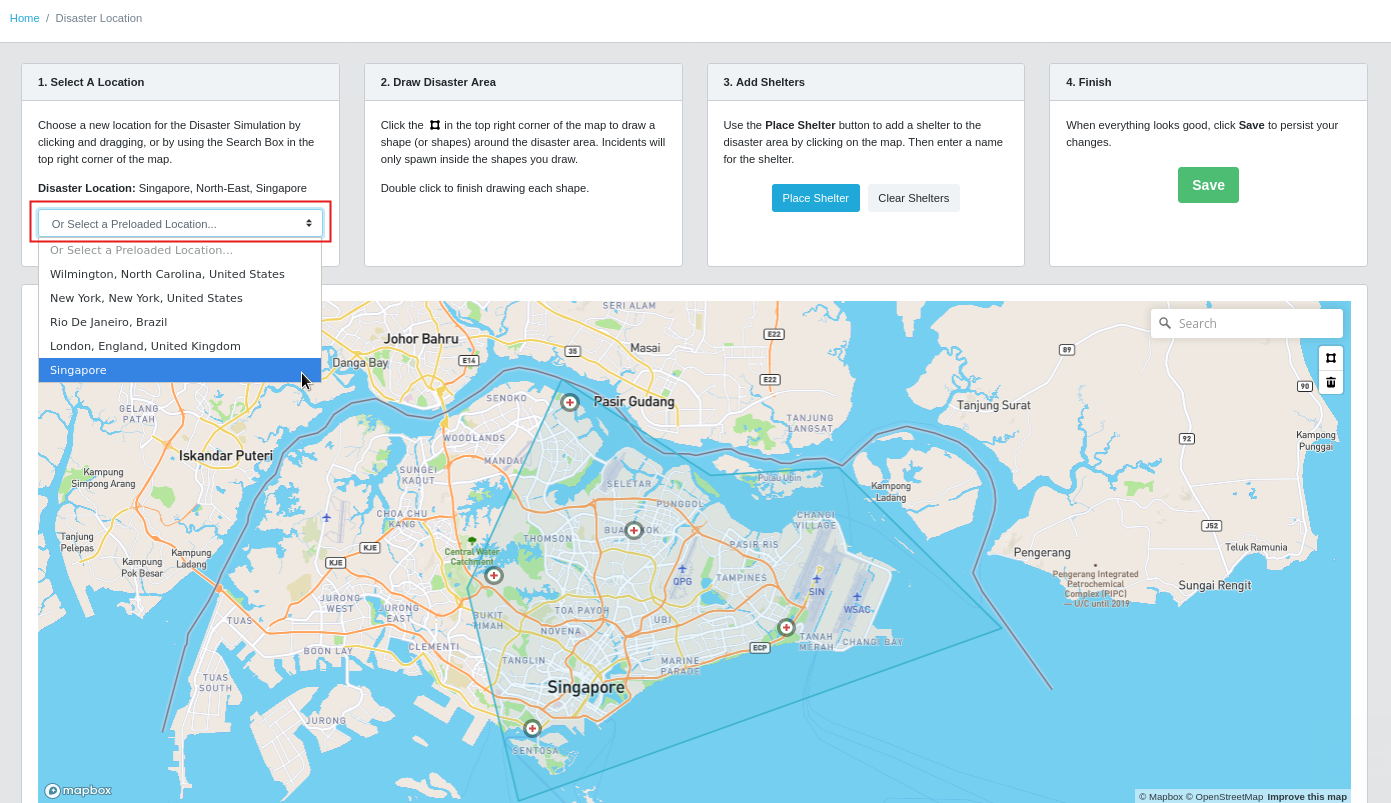
1.1. Modify Disaster Location
Overview
The incident commander has the ability to change the location at which the disaster simulation is set. If your audience is unfamiliar with Wilmington, North Carolina, this is a great opportunity to use a location that is more well-known.
The Emergency Response Demo comes pre-loaded with the following disaster locations:
- Wilmington, North Carolina, United States (default)
- New York City, New York, United States
- Rio De Janeiro, Brazil
- London, England, United Kingdom
- Singapore
One important note is that these changes to disaster location are ephemeral. If your OpenShift environment is shutdown, these changes will be lost.
1.2. Procedure
Note Be sure to perform this step before generating incidents and responders. If you already have incidents, responders and missions in a different disaster location, use the capabilities of the _disaster simulator to delete these resources before changing disaster locations.
- In the Emergency Response web console, authenticate in as: incident_commander.
-
In the left panel, navigate to Disaster Location.
NOTE: If you don’t see a link for Disaster Location, you’re probably not logged in as the correct user: (incident_commander).
- Read the instructions provided
- If all you want to do is change to a different pre-loaded disaster location, then select from the drop down from Option 1.
- Upon selection, the emergency response console will refresh and display the new disaster location
- Beyond just changing the disaster location, this page also allows for drawing of additional disaster areas and adding additional shelters to those disaster locations. Please follow the instructions provided in the page (steps #2 and #3) and then save your changes (step #4)
1.3. Priority Zone
The incident commander has the ability to create priority zones in the inclusion zone of the disaster area. A priority zone could simulate critical conditions (power lines in the water, gas leaks, etc.). It’s recommended that priority zone’s be placed within the inclusion zone. Once placed, priority zones give affected incidents elevated priority so they get matched with available responders more quickly.
1.3.1. Procedure
-
From the Dashboard, click the Create Priority Zone button in the bottom left corner of the map. If you don’t see the button, you’re probably not logged in as the correct user (incident_commander).
-
Drag to create a circle on the map, then adjust the position and size as you see fit. Once you’re done, click Done Drawing. You may optionally create additional priority zones by repeating this step.
Note The most effective way to demonstrate this feature is to first generate a bunch of incidents, then draw a priority zone around a collection of them, then generate responders. If there is a pool of responders waiting for incidents to be generated, incidents will be assigned in the order they are created, and it will appear as though the priority zones are not being taken into account.

2. SSO Admin Console
Red Hat Single Sign-On (RH-SSO) provides web security for the various user and admin consoles of the ER-Demo. It does so by implementing the Authorization Code Flow protocol of the OpenID Connect Specification.
RH-SSO supports all ER-Demo instances that may be deployed on an OpenShift cluster. Each ER-Demo instance utilizes the security settings provided to it by its own dedicated SSO Realm in RH-SSO.
As an RH-SSO, you can manage all SSO Realms via the following:
- Point a browser tab to the output of the following command:
echo -en "\n\nhttps://$(oc get route sso --template='' -n user-sso)/auth/admin/master/console/#/realms/master\n\n"
- Authenticate in the master realm of SSO using a userId of admin and a password determined via the following:
oc project user-sso pod_id=$(oc get pod -o json | jq '.items[]|select(.metadata.labels.deploymentConfig=="sso").metadata.name' | sed 's/"//g') oc rsh $pod_id env | grep SSO_ADMIN_PASSWORD -
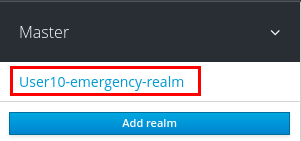
Switch to your desired SSO realm by hovering over the realm drop-down in the top-left of the page:
3. Kafdrop Web Console
The open-source kafdrop admin console for Kakfa / Red Hat AMQ Streams is included as a KNative Service in the Emergency Response demo. This admin console provides insight regarding topics, partitions, consumer groups and messages. You can access and utilize this admin console as follows:
- Point a browser tab to the output of the following command:
OCP_USERNAME=user1  # CHANGE ME IF NEEDED

 echo -en "\n\n$(oc get kservice kafdrop --template='' -n $OCP_USERNAME-er-demo)\n\n"
NOTE: You may have to wait for about 15 seconds after invoking this URL. The Kafdrop admin console is deployed as a KNative Serving service and configured to scale to zero. It’ll take a bit for a new kafdrop pod to spin up.
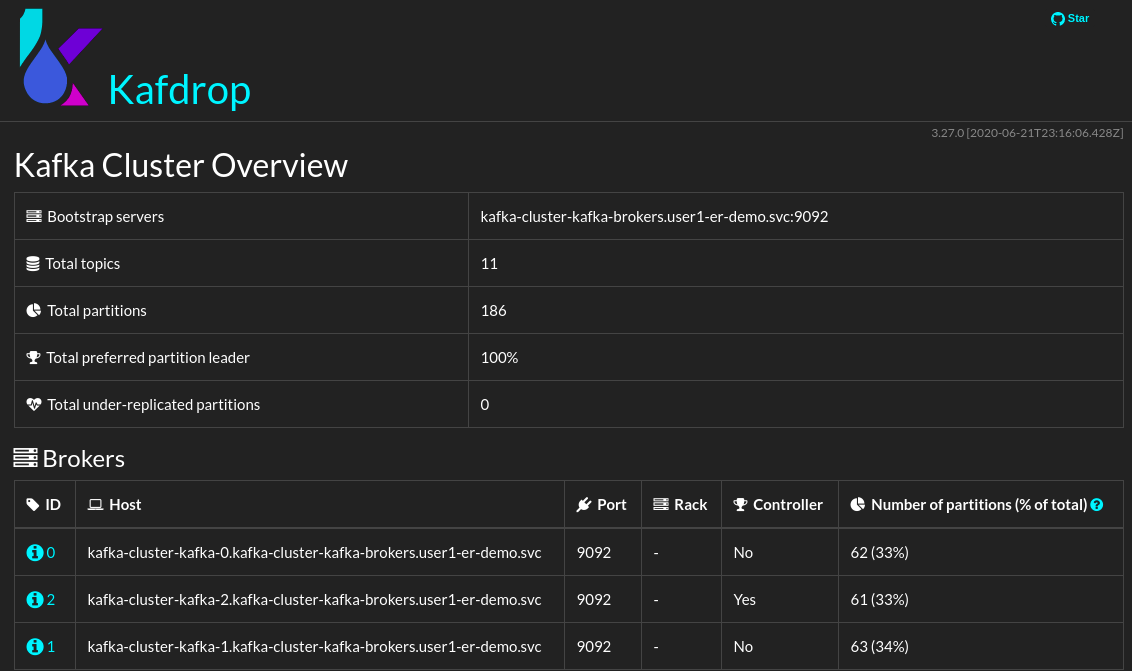
- Scroll down the page to view the list of Kafka Topics Notice the number of partitions per topic. A partition is a single commit log in Kafka. Messages are written to the partition in an append-only fashion, and are read in order from beginning to end. Note that as a topic typically has multiple partitions, there is no guarantee of message time-ordering across the entire topic, just within a single partition. Partitions are also the way that Kafka provides redundancy and scalability. Each partition can be hosted on a different server, which means that a single topic can be scaled horizontally across multiple servers to provide performance far beyond the ability of a single server.
-
Click any of the topics
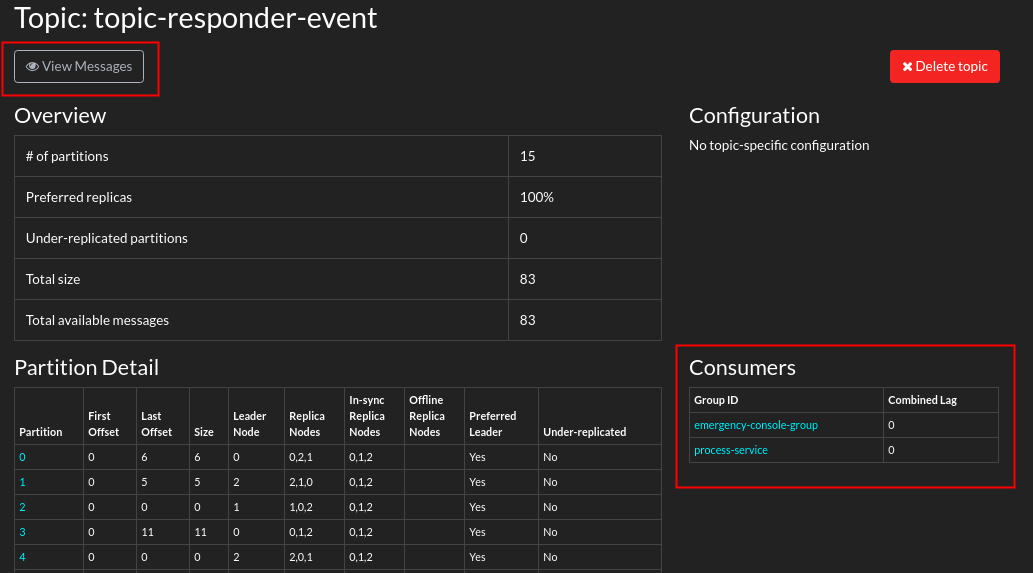
Notice the list of consumers registered to consume messages from this topic. In addition notice the Partition Details.
- In the top left corner of the topic panel, click: View Messages.
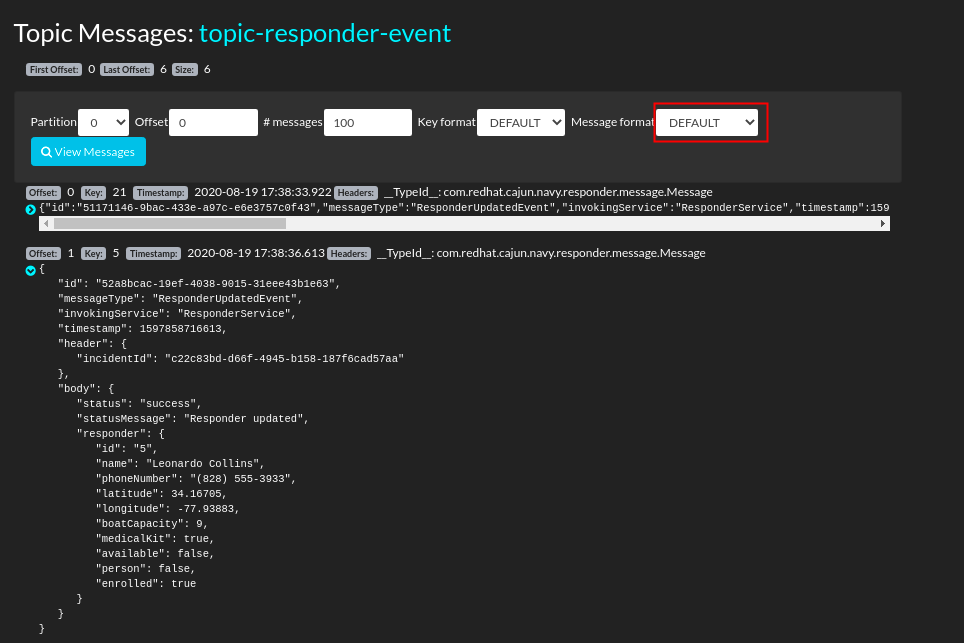
- For the Message format filter, select: DEFAULT. (The DEFAULT format corresponds to JSON serialization, which is what ER-DEMO currently uses for all async message traffic).
-
Notice the list of messages in this topic. Any of the messages can be expanded to view the entire payload.
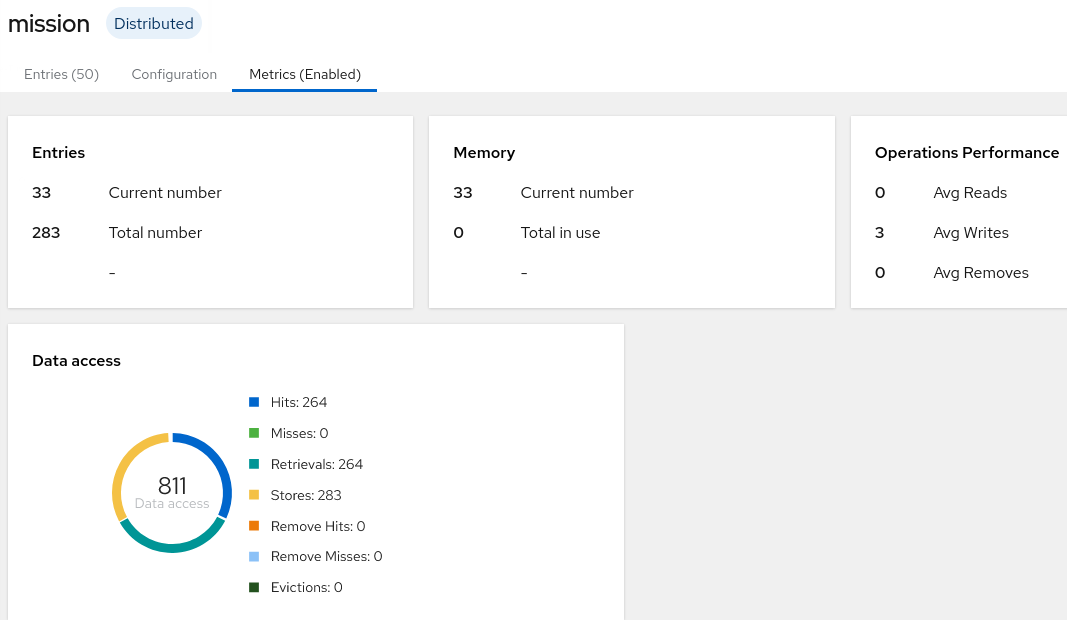
4. Red Hat Data Grid
Red Hat Data Grid serves as a distributed data store for mission and disaster (ie: priority zones, shelter locations, disaster-area, etc) information. Red Hat Data Grid provides a web based administration console that can be enabled as follows:
- Point a browser tab to the output of the following command:
OCP_USERNAME=user1 # CHANGE ME IF NEEDED echo -en "\n\nhttps://$(oc get route datagrid-service-external --template='' -n $OCP_USERNAME-er-demo)/console\n\n" - Authenticate using the following credentials: demo / demo
- View the details of each of the configured remote caches in the Data Container tab:
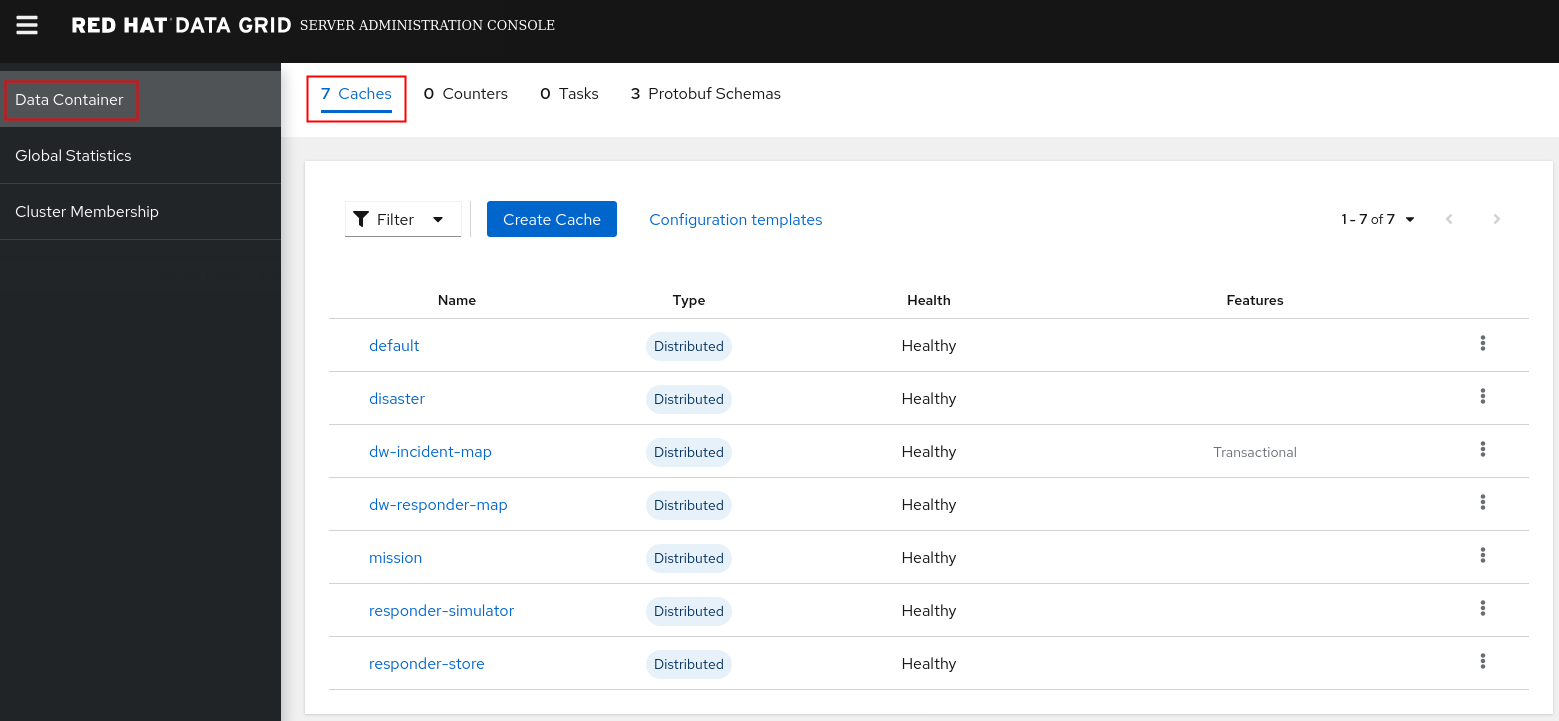
- Click on any of the caches and notice the quantity of cache entries
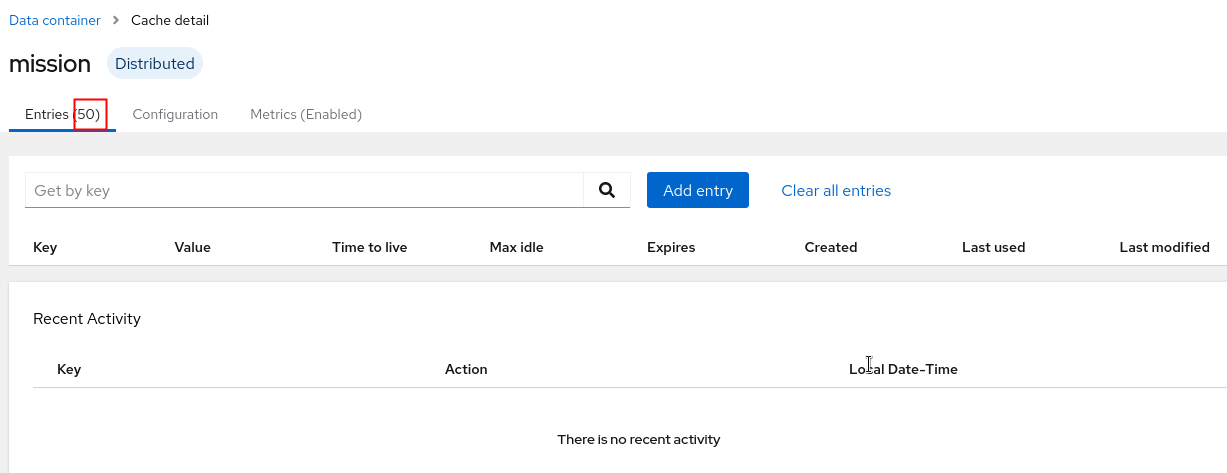
- For more metrics about a specific cache, click on the Metrics tab