- 1. Overview
- 2. MapBox Access Token
- 3. Turn-Key ER-Demo Environment
- 4. Bring Your Own OpenShift 4 Cluster
- 5. Appendix
1. Overview
By this time you are excited and want to try out this application. To do so, you will need to install the application on an OpenShift Container Platform (OCP) 4.* environment. You have the following two options:
-
Turn-Key ER-Demo Environment An Emergency Response Demo application can be obtained via Red Hat Product Demo System (RHPDS). This is the recommended approach for most users.
-
Bring Your Own OpenShift 4 Cluster As an alternative, you can layer an Emergency Response demo environment on an existing OpenShift platform. The installation of the ER-Demo application on your OpenShift cluster is done using an Ansible based operator. This approach is recommended for contributor of the Emergency Response Demo.
NOTE: In all cases, you will need your own MapBox Token. (As per the next section).
2. MapBox Access Token
The Emergency Response application makes use of a third-party SaaS API called MapBox. MapBox APIs provide the Emergency Response application with an optimized route for a responder to travel given pick-up and drop-off locations. To invoke its APIs, MapBox requires an access token. For normal use of the Emergency Response application the free-tier account provides ample rate-limits.
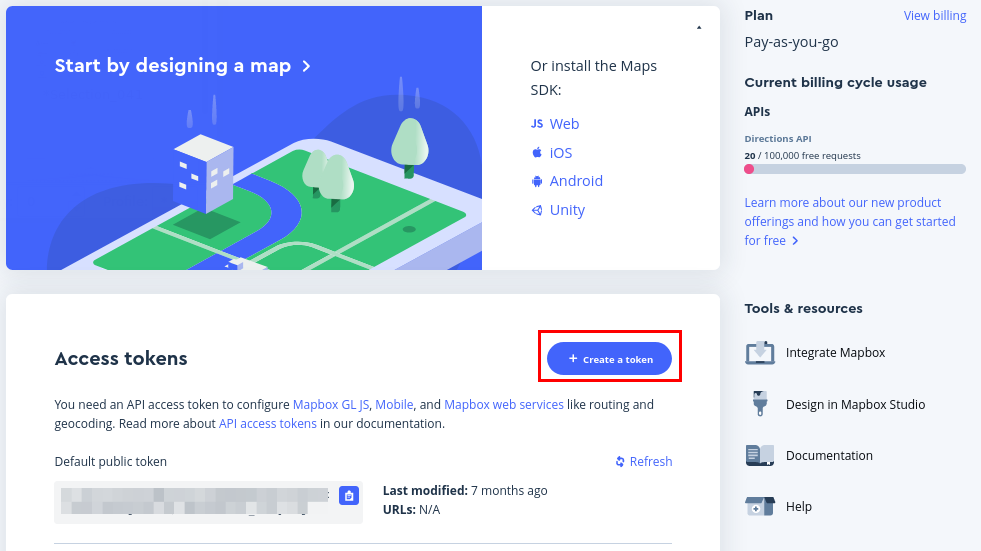
Save your newly created Map Box Access Token. You’ll use it in the following sections.
3. Turn-Key ER-Demo Environment
Use this provisioning approach if you’d like a turn-key experience for acquiring your own Emergency Response demo environment.
As per the previous section, you will need a MapBox Access Token..
3.1. Overview
The Red Hat Product Demo System (RHPDS) provides a wide variety of cloud-based labs and demos showcasing Red Hat software. One of the offerings from RHPDS is a cloud-based OCP 4 environment that meets all of the minimum requirements to support an installation of the Emergency Response application. The default shutdown and lifetime durations of this environment are as follows:
-
Runtime: 10 hours; You have the ability to extend the runtime (one time only) and re-start if it was shutdown.
-
Lifetime: 2 days; You have the ability to extend the lifetime three times for 3 days each. Subsequently, the max lifetime could be up to 11 days.
To utilize RHPDS, you will need the following:
- OPENTLC credentials. OPENTLC credentials are available only to Red Hat associates and Red Hat partners.
- SFDC Opportunity, Campaign ID or Partner Registration
3.2. Order Emergency Response Demo
-
In a web browser, navigate to the Red Hat Product Demo System at: Red Hat Product Demo System.
-
Authenticate using your OPENTLC credentials, for example:
johndoe-redhat.com. -
Navigate to the following catalog: `Services → Service Catalogs → Multi-Product Demos.
-
Select the following catalog item:
Emergency Response Demo.
-
Click
Orderon the next page. -
In the subsequent order form, add in details similar to the following:
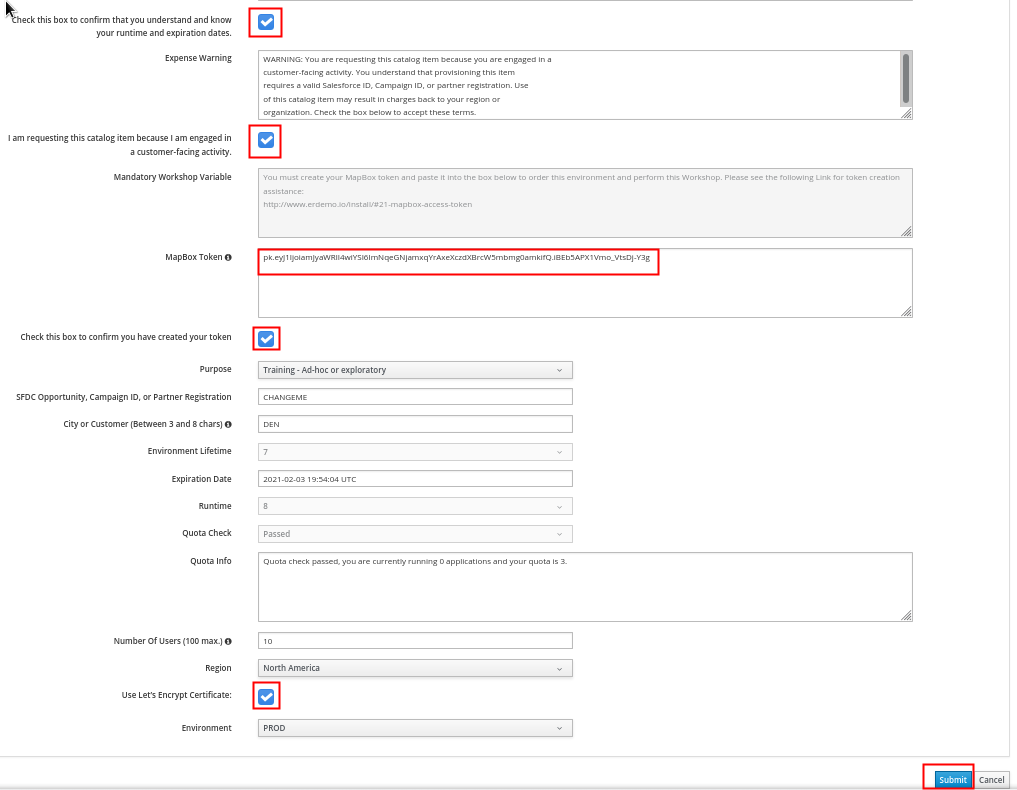
-
At the bottom of the same page, click
Submit.
3.2.1. Confirmation Emails
The provisioning of your OpenShift environment from RHPDS typically takes about 1 hour.
Upon ordering the lab environment, you will receive the following various confirmation emails:
- Your RHPDS service provision request has started: This email should arrive within minutes of having ordered the environment.
- Your RHPDS service provision request has updated: You will receive one or more of these emails indicating that the OCP 4 provisioning process continues to proceed.
-
Your RHPDS service provision request has completed:
- Read through this email in its entirety and save !
- This email includes details regarding its deletion date.
- This email also includes URLs to the OpenShift Web Console
-
Also included is the userId and password of the OpenShift cluster-admin user.
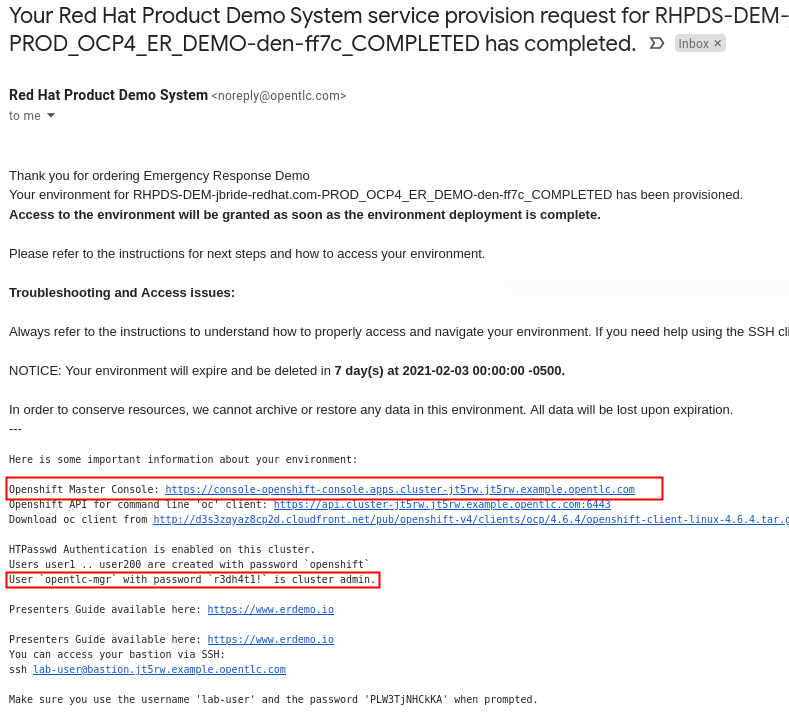
- After having received this email, please wait another 15 minutes to allow the underlying services to complete provisioning.
3.2.2. ER-Demo Web Consoles
Now that installation of the Emergency Response app is complete, you should be able to navigate your browser to its web consoles.
These ER-Demo URLs can be found via the OpenShift Web Console.
At this time, locate the URL along with opentlc-mgr user credentials to the OpenShift Web Console found in the 3rd email sent by RHPDS.
Once authenticated into the OpenShift Web Console as opentlc-mgr, navigate to the following :
Administration -> user1-er-demo -> Networking -> Routes
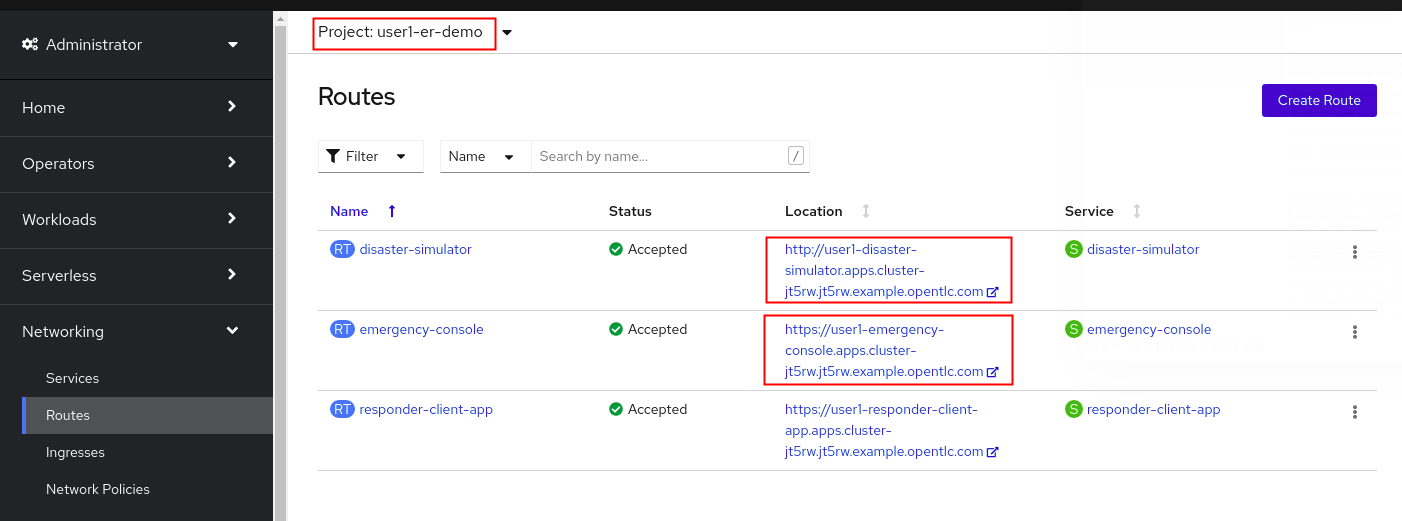
3.2.3. Emergency Response Console
-
Click the URL to your emergency-console:
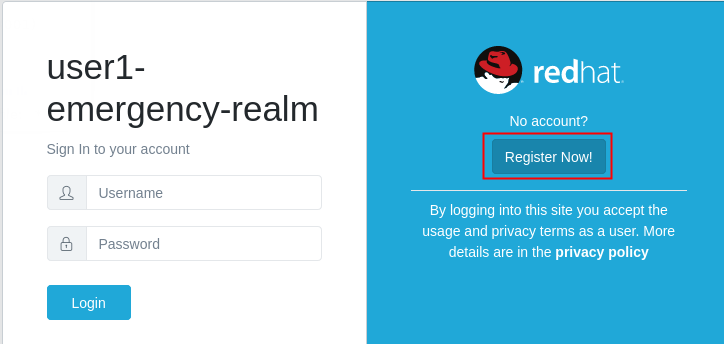
-
More information about the Emergency Response Console is found in the Getting Started Guide.
3.2.4. Disaster Simulator
-
Click the URL to your disaster-simulator
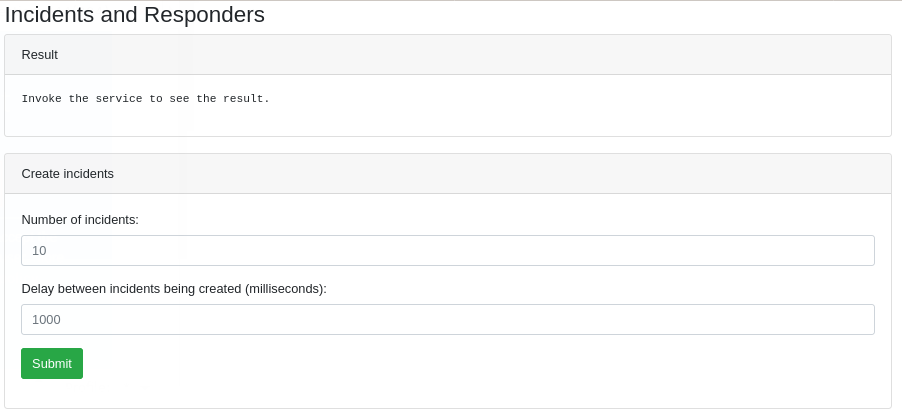
-
More information about the Disaster Simulator is found in the Getting Started Guide.
3.2.5. Grafana Dashboards
-
In the OpenShift Web Console, view the routes in the uer1-er-monitoring project
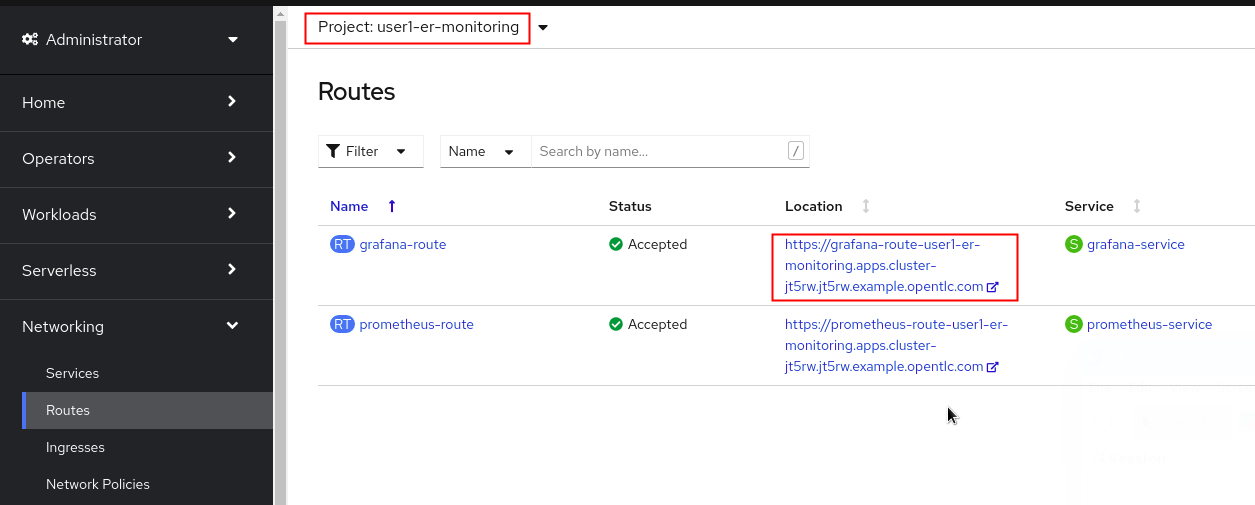
-
Click the URL to your grafana dashboards:
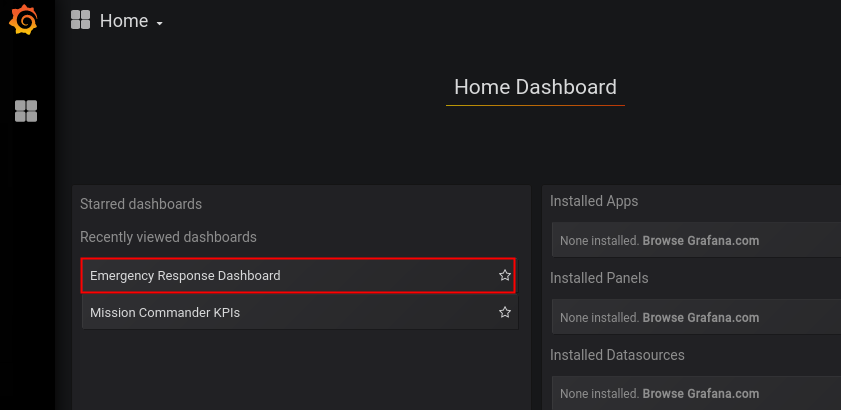
- Once Emergency Response incidents are created, you will see corresponding metrics:

- More information about the out-of-the-box Dashboards in Grafana for the Emergency Response application found in the Getting Started Guide.
Please navigate to the Getting Started Guide for details on using your newly provisioned ER-Demo environment.
4. Bring Your Own OpenShift 4 Cluster
Use this provisioning approach if you have your own OpenShift 4 environment.
4.1. Overview
To host the Emergency Response demo, it is recommended that you use your own OpenShift 4 environment..
The benefit of utilizing your own OpenShift environment is that you decide if/when to shut it down and the duration of its lifetime. In addition, if there are any errors in the provisioning process of OpenShift, you will have some ability to troubleshoot the problem.
Otherwise, if you are a Red Hat associate or Red Hat partner, you can order an OpenShift 4 environment from Red Hat’s Partner Demo System (RHPDS). Using RHPDS, the minimum requirements described below are met. However, there are known risks and challenges. Details pertaining to these risks as well as accessing an OpenShift 4 environment from RHPDS are found in the Appendix of this document.
4.1.1. Minimum Requirements
To install the Emergency Response application, you will need a full OpenShift Container Platform environment with the following minimum specs:
- OCP Version: 4.6
- Memory: 32 GBi allocated to one or more worker node(s)
- CPU: 12 cores available across one or more worker nodes (and not being consumed by OCP itself)
-
Disk: 20 Persistent Volumes that support Read Write Once (RWO).
The Emergency Response application does not require Read-Write-Many (RWX). Every PV should be at least 5GB in size.
- Credentials: You will need cluster-admin credentials to your OpenShift environment.
-
CA signed certificate: Optional
Preferably, all public routes of your Emergency Response application utilize a SSL certificate signed by a legitimate certificate authority. ie: LetsEncrypt
- Non cluster-admin users: The Emergency Response application will be owned by a non cluster-admin project administrator. In your OpenShift environment, you will need one or more non cluster-admin users to serve this purpose. In Code Ready Containers, the default non cluster-admin user is: developer . In other OpenShift clusters, the convention tends to be: user[1-200].
- Pull Secret: Some Linux container images used in the Emergency Response application reside in the following secured image registry: registry.redhat.io. Those images will need to be pulled to your OpenShift 4 environment. As part of the installation of OCP4, you should have already been prompted to provide your pull secret that enables access to various secured registries to include regisry.redhat.io.
- OpenShift Monitoring Capabilities WARNING: Avoid the use of CodeReady Containers to host the ER-Demo. For one, the monitoring capabilities of the demo will not be available..
-
Operator Lifecycle Manager (OLM) Operators
OLM needs to be installed and the following operators need to be available for installation (NOTE: You do not need to install them manually …. they will be installed automatically via the ER-Demo installer):
- Red Hat Single Sign-On Operator
- Red Hat Integration - AMQ Streams
- Red Hat OpenShift Serverless
- Data Grid
- Prometheus Operator
- Grafana Operator
4.2. Installation
Now that you have an OpenShift environment that meets the minimum requirements, you can now layer the Emergency Response application on that OpenShift. You will do so using an ansible playbook.
4.2.1. Operator
- Login to an OpenShift cluster as a
cluster-admin - Create a new
CatalogSourcefor enabling the ER-Demo operator inOperator Hub-
In the top left corner of the OpenShift console, navigate to the
Developer Perspective: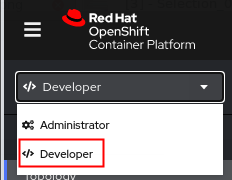
-
In the left pallet, select:
+Add, specify theopenshift-marketplaceproject and then select theYamloption: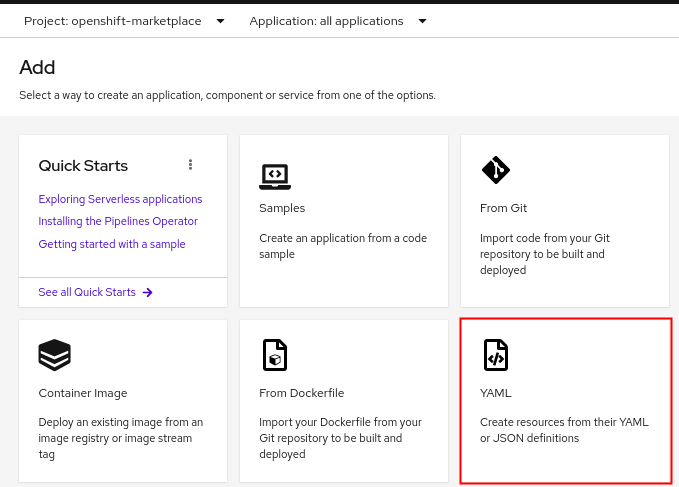
- Populate the contents of the new yaml file with the following:
apiVersion: operators.coreos.com/v1alpha1 kind: CatalogSource metadata: name: erdemo-operators namespace: openshift-marketplace spec: sourceType: grpc image: quay.io/emergencyresponsedemo/erdemo-operator-catalog:2.12.0 displayName: Emergency Response Demo Operator publisher: RedHatGov -
Click the
Createbutton at the bottom - NOTE: in the
openshift-marketplacenamespace, there should now be a pod called:erdemo-operators-XXXXX
-
- Create a project named erdemo-operator-system for your operator deployment to live.
-
While still in the
Developer Perspective, click theProjectdropdown and then selectCreate Project: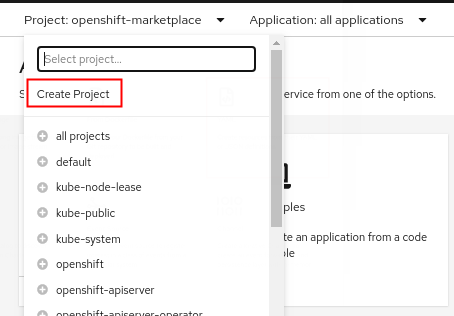
-
Set the name as
erdemo-operator-systemand clickCreate: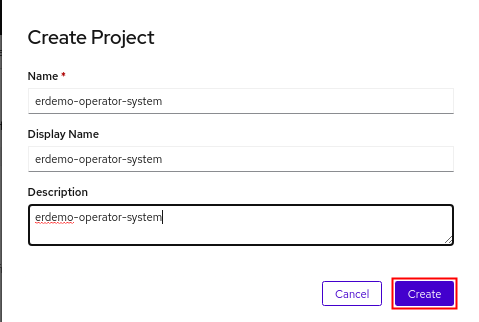
-
- Install the ER-Demo operator
- Switch to the
Administratorperspective of the Openshift web console. - Switch to the
erdemo-operator-systemproject. -
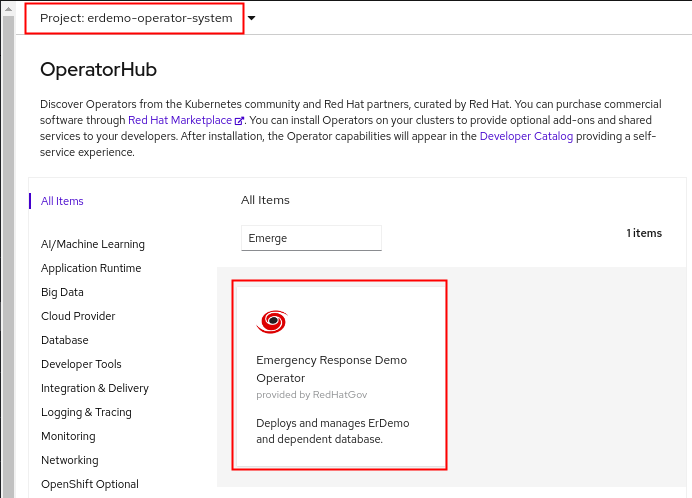
Navigate to Operators -> OperatorHub and search for “Emergency Response Demo Operator”. Select it.
-
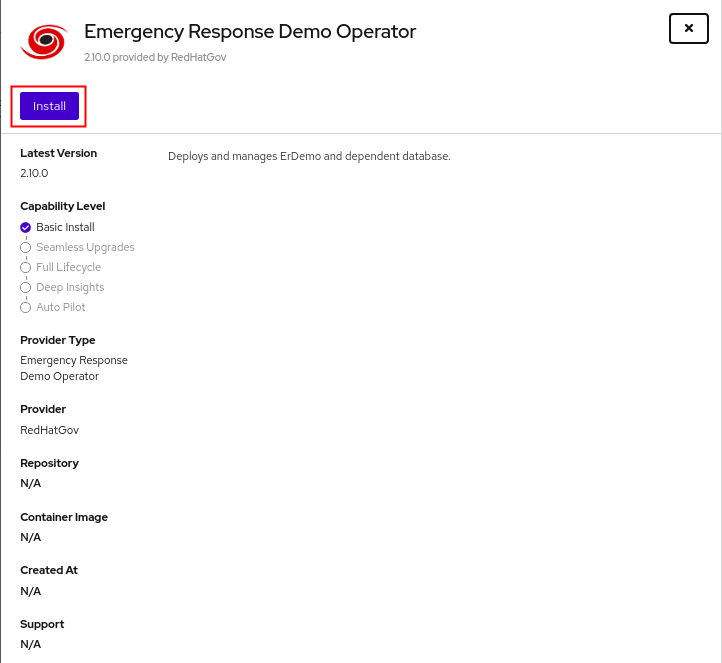
On the operator overview page, click Install.
-
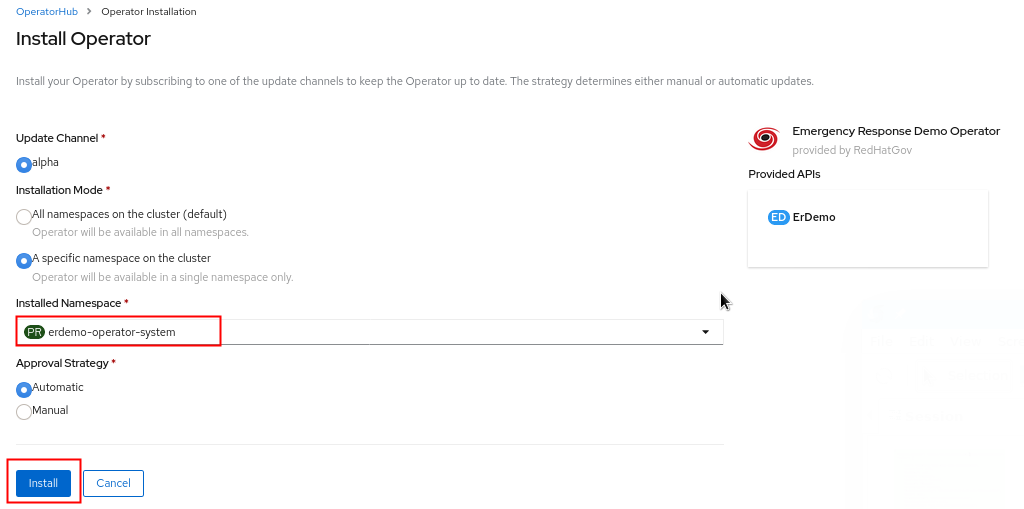
Set Installation Mode to A specific namespace on the cluster and set Installed Namespace to erdemo-operator-system.
-
Leave other options as default and click Install once more.
-
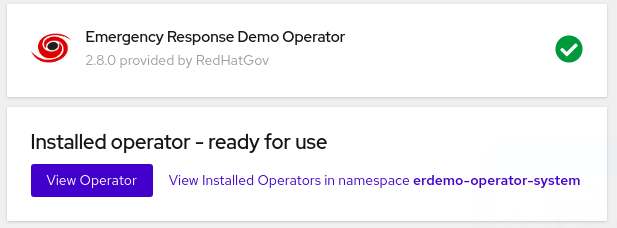
Wait until the operator has installed, then click View Operator
- NOTE: A deployment called
erdemo-operator-controller-managerwill have been created in theerdemo-operator-systemnamespace.
- Switch to the
4.2.2. ERDEMO Resource
- Create an
erdemoresource-
Ensure that your project remains set to
erdemo-operator-systemand then in the ErDemo tab, click Create ErDemo: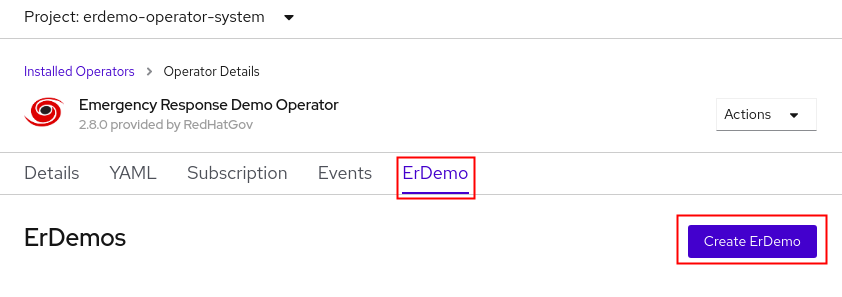
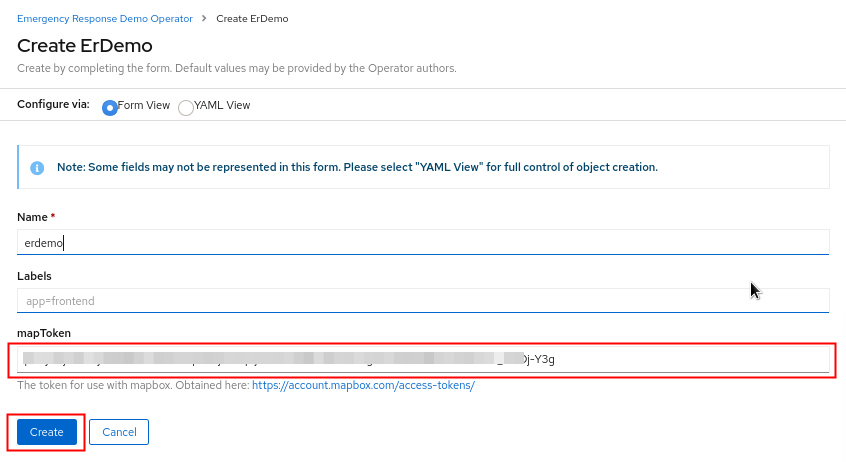
-
In the ErDemo Operator page, set the value of mapToken to match your own mapbox API token.
-
The status of your erdemo installation should be: Running. Wait about 20 minutes until the status of the ER-Demo installation changes to:
Succeeded
-
- Validate Deployment
-
Notice the existence of the
keycloakoperator in theer-ssonamespace: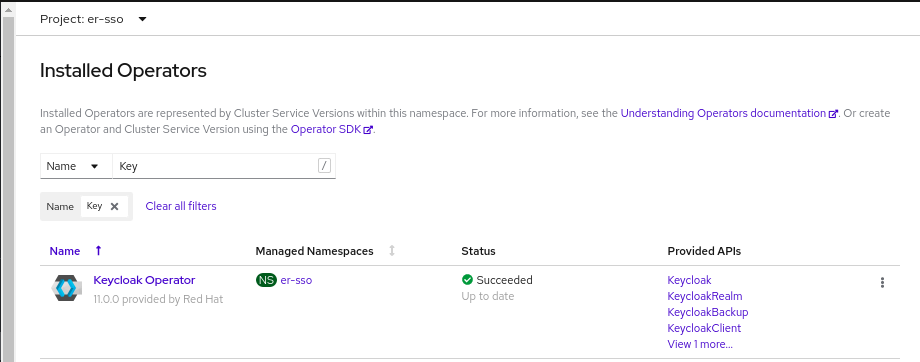
-
Notice the existence of the
AMQ Streamsoperator: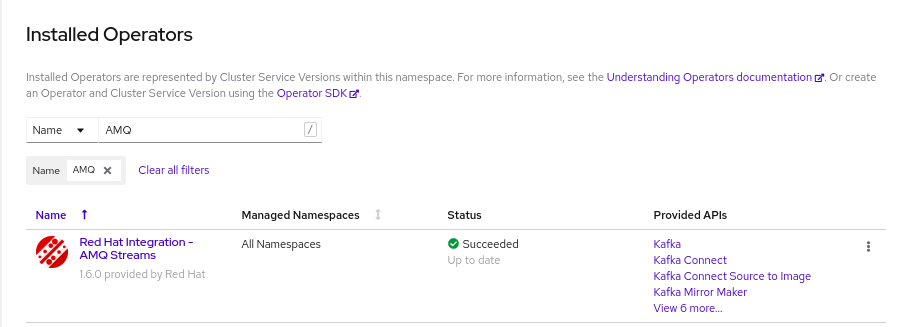
-
Notice the existence of the
Serverlessoperator: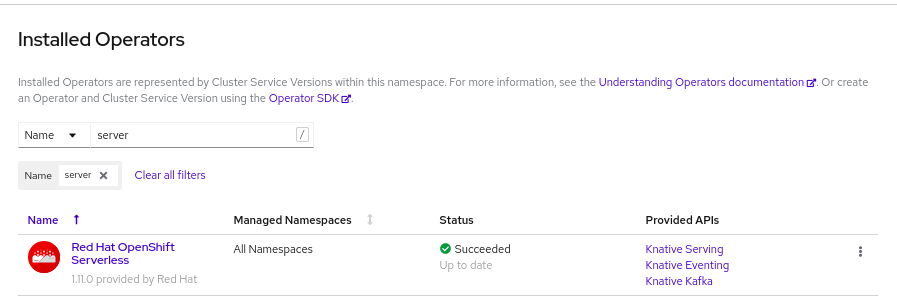
-
4.2.3. Installation Complete !
Congratulations on having installed the ER-Demo !
4.2.3.1. Sanity Checks
A few sanity-checks that you can execute prior to getting started with the demo are as follows:
-
Ensure that the statefulsets that support the ER-Demo are healthy:
$ oc get statefulset -n user1-er-demo NAME READY AGE datagrid-service 3/3 6d13h kafka-cluster-kafka 3/3 6d14h kafka-cluster-zookeeper 3/3 6d14h -
Ensure that the ER-Demo deployments are healthy:
$ oc get dc -n user1-er-demo NAME DESIRED CURRENT dw-postgresql 1 1 postgresql 1 1 process-service-postgresql 1 1 user8-datawarehouse 1 1 user8-disaster-service 1 1 user8-disaster-simulator 1 1 user8-emergency-console 1 1 user8-incident-priority-service 1 1 user8-incident-service 1 1 user8-mission-service 1 1 user8-process-service 1 1 user8-process-viewer 1 1 user8-responder-client-app 1 1 user8-responder-service 1 1 user8-responder-simulator 1 1 -
Ensure that all of pods are stable and are not being restarted:
$ oc get pods -w -n user1-er-demo
4.3. Deployment Topology
A complete topology of all of the components that have been installed can be found here. As you become more familiar with the ER-Demo, consider cross-referencing all the components listed in this diagram with what is actually deployed in your OpenShift cluster.
Also, the ER-Demo Architecture Guide provides details of the various components that make up the ER-Demo.
4.4. ER-Demo Web Consoles
Now that installation of the Emergency Response app is complete, you should be able to navigate your browser to the following URLs:
4.4.1. Emergency Response Console
-
Navigate to the URL from the following command:
echo -en "\nhttps://$(oc get route emergency-console -n user1-er-demo --template='')\n\n" -
More information about the Emergency Response Console is found in the Getting Started Guide.
4.4.2. Disaster Simulator
-
Navigate to the URL from the following command:
echo -en "\nhttp://$(oc get route disaster-simulator -n user1-er-demo --template='')\n\n" -
More information about the Disaster Simulator is found in the Getting Started Guide.
4.4.3. Grafana Dashboards
-
Navigate to the URL from the following command:
echo -en "\nhttps://$(oc get route grafana-route -n user1-er-monitoring --template='')\n\n" - Once Emergency Response incidents are created, you will see corresponding metrics:
- More information about the out-of-the-box Dashboards in Grafana for the Emergency Response application found in the Getting Started Guide.
Further details regarding how to run the ER-Demo can be found in the Getting Started Guide.
5. Appendix
5.1. Vanilla OCP4 from RHPDS
5.1.1. Overview
The Red Hat Product Demo System (RHPDS) provides a wide variety of cloud-based labs and demos showcasing Red Hat software. One of the offerings from RHPDS is a cloud-based OCP 4 environment that meets all of the minimum requirements to support an installation of the Emergency Response application. The default shutdown and lifetime durations of this environment are as follows:
-
Runtime: 10 hours; You have the ability to extend the runtime (one time only) and re-start if it was shutdown.
-
Lifetime: 2 days; You have the ability to extend the lifetime three times for 3 days each. Subsequently, the max lifetime could be up to 11 days.
To utilize RHPDS, you will need the following:
- OPENTLC credentials. OPENTLC credentials are available only to Red Hat associates and Red Hat partners.
- SFDC Opportunity, Campaign ID or Partner Registration
5.1.2. Risks and Challenges
-
Provisioning failure rates from RHPDS can be high. Each provisioning attempt for an OCP 4 cluster consists of hundreds of steps, many of which rely on third-party services. You may need to attempt numerous times over the course of days.
-
Shutdown and Restarts Your OpenShift environment will shut down at known periods (typically 10 hours) and will be deleted after a certain duration (typically 2 days). The real problems typically occur with a restart of the cluster. ie: AWS EBS is known to go stale from time to time with the restart of a cluster.
WARNING: ALWAYS SMOKE TEST YOUR ER-DEMO ENVIRONMENT AFTER A CLUSTER RESTART !!! .
5.1.3. Order OCP4
-
In a web browser, navigate to the Red Hat Product Demo System at: Red Hat Product Demo System.
-
Authenticate using your OPENTLC credentials, for example:
johndoe-redhat.com. -
Navigate to the following catalog: `Services → Service Catalogs → Multi-Product Demos.
-
Select the following catalog item:
OCP Cluster for ER-Demo (self-install).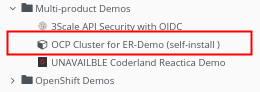
-
Click
Orderon the next page. -
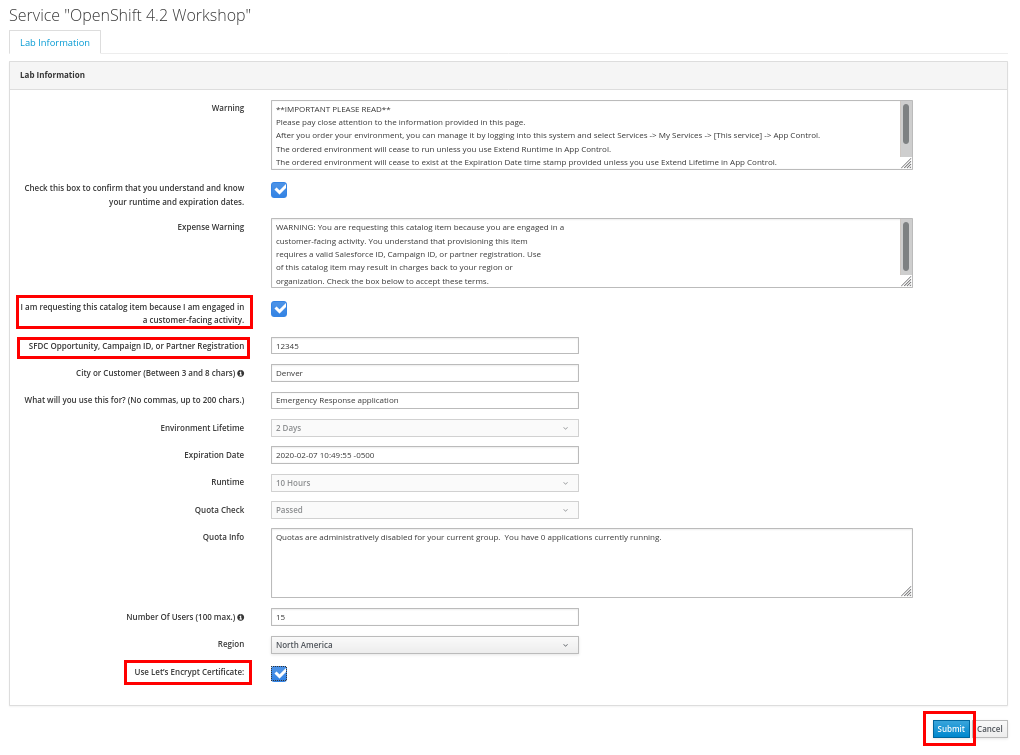
In the subsequent order form, add in details similar to the following:
-
At the bottom of the same page, click
Submit.
5.1.4. Confirmation Emails
The provisioning of your OpenShift environment from RHPDS typically takes about 1 hour.
Upon ordering the lab environment, you will receive the following various confirmation emails:
- Your RHPDS service provision request has started: This email should arrive within minutes of having ordered the environment.
- Your RHPDS service provision request has updated: You will receive one or more of these emails indicating that the OCP 4 provisioning process continues to proceed.
-
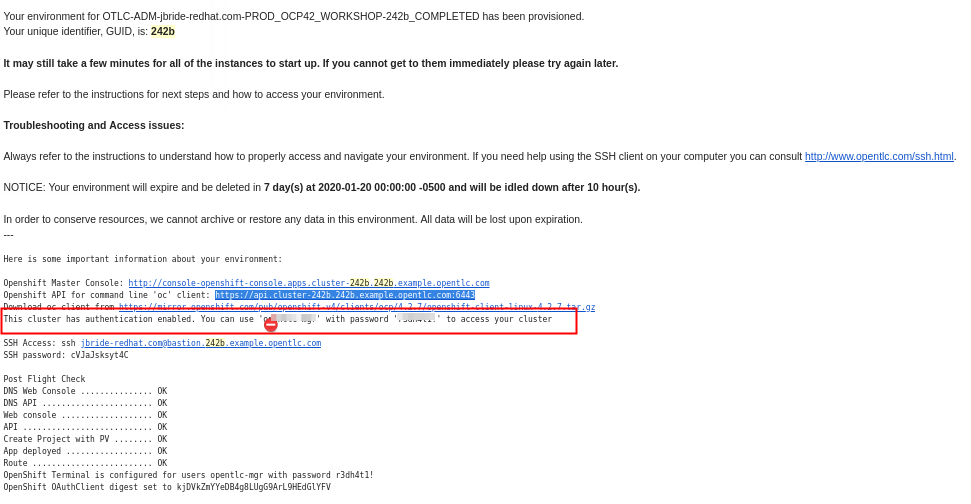
Your RHPDS service provision request has completed:
- Read through this email in its entirety and save !
- This email includes details regarding its deletion date.
- This email also includes URLs to the OpenShift Web Console as well as the OpenShift Master API.
-
Also included is the userId and password of the OpenShift cluster-admin user.
5.1.5. Access
- Upon reading through the completion email, you should authenticate into the OpenShift environment as a cluster admin. You will execute a command similar to the following:
oc login https://api.cluster-242b.242b.example.opentlc.com:6443 -u <cluster-admin user> -p '<cluster-admin passwd>' - Validate the existance of all master and worker nodes:
oc adm top nodes NAME CPU(cores) CPU% MEMORY(bytes) MEMORY% ip-10-0-138-177.ap-southeast-1.compute.internal 456m 13% 2632Mi 17% ip-10-0-141-34.ap-southeast-1.compute.internal 332m 2% 3784Mi 5% ip-10-0-145-167.ap-southeast-1.compute.internal 598m 17% 2847Mi 18% ip-10-0-150-7.ap-southeast-1.compute.internal 341m 2% 3445Mi 5% ip-10-0-167-23.ap-southeast-1.compute.internal 173m 1% 2699Mi 4% ip-10-0-173-229.ap-southeast-1.compute.internal 567m 16% 3588Mi 23% -
Verify login access using non cluster-admin user(s):
-
Your OpenShift environment from RHPDS is pre-configured with 200 non cluster-admin users. Details of these users is as follows:
- userId: user[1-200] ; (ie: user1, user2, user3, etc)
- passwd: see this doc for details.
- Using the credentials of one of these users, verify you can authenticate into OpenShift:
oc login -u user1 -p <password> ... Login successful. You don't have any projects. You can try to create a new project, by running oc new-project <projectname> - Re-authenticate back as cluster-admin:
oc login -u <cluster admin user> -p <cluster admin passwd> - View the various users that have authenticated into OpenShift:
oc get identityNow that your OpenShift 4 environment has been provisioned from RHPDS, please return to the section above entitled: Installation Procedure.
-